4 Causes of Burns in Injection Molding
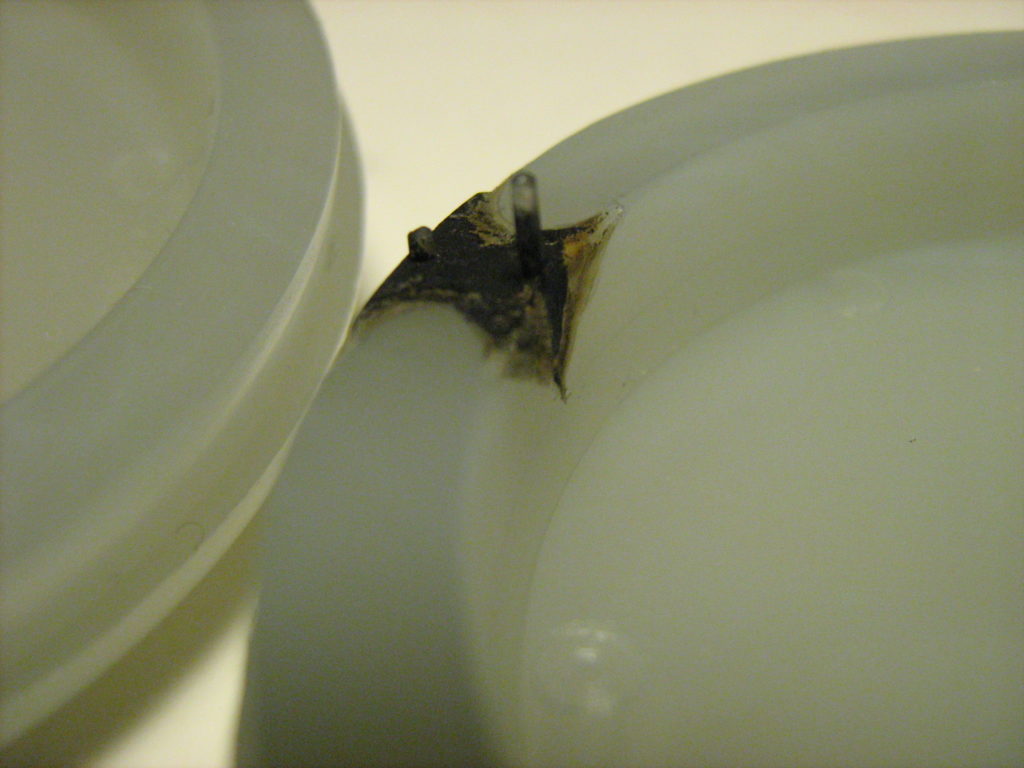
Sometimes known as dieseling or gas traps, burns in injection molding are literally that: burns. Often appearing as black, smutty deposits on the part and mold surface, these are spots at which the plastic has burned.
Not to be confused with color swirl or brown streaking, burns are actual burns to the part and/or mold and need to be treated as such.
What Causes Burns?
Although usually caused by a venting issue, the culprit can come from one of four areas: molding process, the mold itself, the machine or the material.
When gas gets trapped in the mold, high pressures can cause ignition, which leads to the burns. But why are gases getting trapped? This is what we need to diagnose and solve. If you can avoid it, don’t try to process around a burn issue. Look at tooling issues before you start altering the process.
Burns Troubleshooting Chart
| Mold | Machine | Materials | Molding Process |
|---|---|---|---|
| Venting | Buildup on screw, endcap, etc. | Moisture content | Too fast fill velocity |
| Grease, oil, or other contamination | Screw design | Type | High melt temperature |
| Barrel heater control problems | Additives | High back pressure | |
| Damage to screw, barrel, tip, etc. | Decompression |
How to Prevent Burns in Molded Plastics
As we said earlier, improper venting is the most frequent cause of burns in injection molding. When troubleshooting the mold—which is where you should start—make sure there’s proper venting. Improving the venting of a mold will often solve the burn problem. Along with that, make sure the mold is clean. Even if the mold has proper venting, contaminants in the mold can hinder the venting from working properly.
The machine could have buildup on the screw, or the screw design itself could be a problem. There could be damage to the screw (or the barrel or tip or other parts) or you may have control problems with the barrel heater. Any of these things can cause dieseling on your parts.
Next, take a look at the materials. Higher moisture content leads to a greater chance of creating gas as the water gets hot and turns into steam. Some materials, like PVC and acetate, simply burn easier than others, so keep that in mind as you process.
After going through all possible tooling issues, you can get into the process. Again, trying to process around a burn issue isn’t ideal—adjusting fill velocity, melt temperature, back pressure and decompression is fine if you’re confident in your machine and materials (particularly the venting), but trying to change the process before checking out tooling issues will only make things less efficient and, probably, more expensive.
As mentioned earlier, contaminants in the mold can hinder venting. To remove contaminants, try the Nanoplas line of cleaners. Formulated with superior cleaning agents, they get grime and dirt out of the pores of the substrate, cleaning down to the virgin metal.
If there is harder to remove residue, like gas stains, you can use Zap-Ox cream cleanser, which eliminates the toughest gas stains without etching the surface. Simply apply Zap-Ox and move it around until all the residue is gone – no scrubbing required.