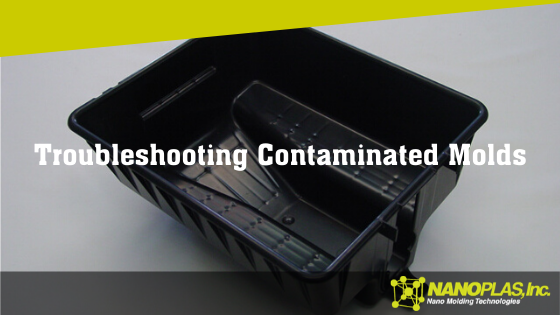
Contamination appears as discoloration, streaks, splay, delamination and other types of defects. Because it’s such a broad area with multiple possible culprits, is best to start with the usual suspect: the material brought to the molding machine.
Troubleshooting Contamination
Starting with the material, then working backward from there if necessary, you’re more likely to catch the root cause of the contamination earlier in the process, saving you time and energy and getting things back up and running as soon as you can.
Molding Process
Mold
Machine
Material
Poor changeover
Hot runner hang-up
Hang-up areas
Improper storage
High melt temperature
High hot runner temperature
Anti-seize
Regrind
Wear Surfaces
Robot contamination
Incoming contamination
Lubricants
Mixed Materials
Cleaning
How to Eliminate Contamination in Injection Molding
Start with material storage. If your material is left in an open container, it’s nearly certain you’ll end up with a contaminant. Every molding shop has dust, dirt, cardboard, wood, metal, grease and other potential contaminants in abundance. If your materials aren’t stored properly, any one of those foreign substances can lead to contamination and a rejected part.
Another potential issue with the material is regrind. Make sure no one is grinding the wrong material with other materials (for example, just because one material is the same color as another doesn’t mean it’s the same material). Improper storage of regrind can be an issue if foreign substances can sully the material. The machine itself, if not properly cleaned, can add contaminants to the regrind.
Avoid mixing materials. Not only can putting the wrong materials together lead to contamination, but some—like PVC and acetal—are dangerous when mixed.
If you confirm everything is being done right with your materials, you can move into the process settings, mold and machine to see if any contaminants are being introduced there.
Want to learn more? Check out these other great articles that solve common injection mold issues:
In all phases of the molding process—first stage, second stage and cooling—the cavities must be treated the same. If not, you run the risk of several different injection molding defects. We can prevent these issues in advance by ensuring six key factors are as they should be.
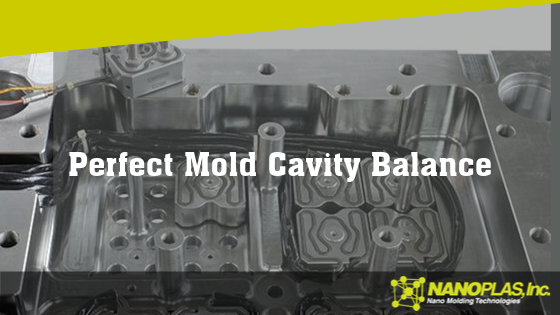
What is Cavity Balance?
The measure of how evenly a multicavity mold fills is called cavity balance. Multicavity molds aren’t as consistent as single-cavity molds, but since multicavity molds can usually produce parts at a lower cost, it’s essential to make sure the mold is designed for a balanced multicavity. If one cavity fills ahead or behind the others, the plastic in that cavity will process differently, resulting in a different part.
We should emphasize the importance of cavity balance throughout the entire process. During the fill, pack, hold, gate seal, shear and cooling phases, every cavity must be experiencing equal conditions.
Injection Molding Defects Caused by Poor Cavity Balance
If you don’t have proper cavity balance in your mold, you could end up facing:
Short shots
Flash
Sink
Burns
Voids
Dimensional issues
Warp
Sticking
Gloss
This is a pretty big range of issues that can derail your production and potentially your cost savings of using multicavity molds.
Six Factors for Perfect Cavity Balance
In order to ensure cavity balance, the following conditions must be equal in all cavities:
Flow length
From the material inlet to each cavity, the flow length should be designed to be the same for all cavities.
Flow diameter
Similar to the importance of flow length, the flow diameter through the runners has to be equal for each cavity. Varying flow diameters can cause a whole new set of problems.
Shear
Even with identical flow length and diameters, eight-cavity molds will still run with imbalance as the four inner cavities usually fill before the outer cavities. This can be combatted with John Beaumont’s MeltFlipper®, which solves the root cause of imbalance. You can also add a hot-runner system that lets you group four cavities at a time, although you could still find problems with shear imbalance, albeit not as sever.
Cooling
Efficient cooling is required to ensure there are no differential mold temperatures. Start the inlet water at the center of the mold, look for a mold surface temperature variation of 10° F and the difference between water inlet and outlet temperature of any circuit should be a maximum of 4° F.
Venting
Equal venting of all cavities lets them each experience the same conditions. If one cavity is poorly vented, it will probably burn or short.
Clamp pressure
Without equal clamp pressure applied across a mold, you risk non-uniform venting.
Multicavity molds are great for production time and cost savings as long as you ensure these six key factors are consistent every single time.
Want to learn more? Check out these other great articles that solve common injection mold issues:
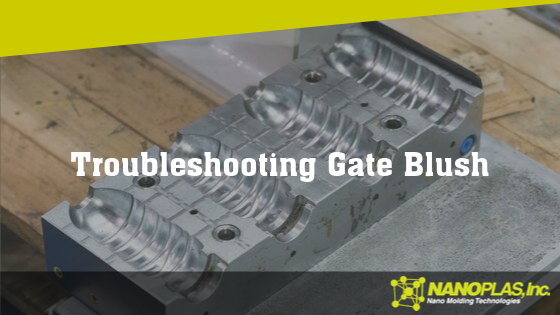
When you see a non-uniform fanning out from the gate, which appears as a different color or gloss level to the surrounding plastic, you may be dealing with gate blush.
What is Gate Blush?
Also known simply as blush, or gate shear or halos, gate blush is a dull or discolored portion usually found just inside the gate location of a part. Occasionally, gate blush will show up in areas where there’s a wall-stock transition.
Blush can be confused with jetting, flow lines and flow marks, so you need to be careful when troubleshooting. Since jetting gives a blush-like appearance, you’ll want to confirm you’re dealing with gate blush before troubleshooting.
Troubleshooting Gate Blush
If you’re experiencing blush, it could be due to the molding process, mold itself or the machine. See below for possible causes.
Molding Process
Mold
Machine
Material
Injection velocity
Gate geometry
Nozzle
Nozzle temperature
Hot runner tip temperature
Machine performance
Mold temperature
Cold slug well
Melt temperature
Gate location
Table 18.1 Gate Blush Troubleshooting Chart, found in Injection Molding Advanced Troubleshooting Guide: The 4M Approach (p. 142)
How to Eliminate Gate Blush in Injection Molding
Most often, the culprit is an injection velocity that’s set too high. However, the solution isn’t as simple as lowering the injection velocity. Not at first, anyway. Before you reduce the fill speed, ensure your gate size and design are adequate. If your blush is caused by something with the tooling design and you try to process around it, you risk other defects, particularly short shots.
Pay attention to all temperatures: nozzle, mold and melt. If the nozzle or mold temperatures are too high, it can impact the first plastic in the mold, resulting in blush. A melt temperature that’s too high can hurt the quality of the initial formation of plastic out of the gate.
As we mentioned, check the size and design of the gate before attempting to process around a potential tooling issue. If the gate isn’t flush to the mold surface, that needs to be adjusted before you change any of the settings with the molding process.
If the problem is with the machine itself, your first place to look should be the nozzle. Its length, style, tip type, tip orifice and heaters all need to match the documented process.
Although less common, there could be issues with the material. PC/ABS blends and TPOs tend to be the most prone to gate blush.
Want to learn more? Check out these other great articles that solve common injection mold issues:
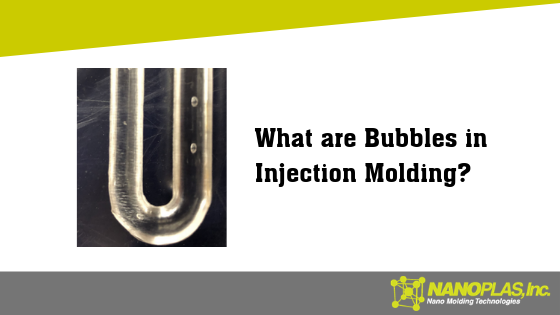
Are you experiencing bubbles during your injection molding processes? Let’s go through the possible causes—and fixes—to get rid of bubbles.
What are Bubbles in Injection Molding?
Bubbles, sometimes known as gas traps or blisters, are cosmetic defects that detract from the looks of the part, which is especially irritating if the part will be seen. When diagnosing bubbles, you need to be careful, as the characteristics are similar to voids. Before you can troubleshoot bubbles (or voids), you need to be sure which one you’re dealing with.
Is it a Bubble or a Void?
When gas forms in the melt stream, you end up with bubbles. Voids are instances of plastic shrink that creates a vacuum in the plastic wall stock.
To determine whether you’re looking at bubbles or voids, slowly heat the area with a torch or heat gun. If it’s a void, the wall stock will collapse and show a sink. If it’s a bubble, the wall stock will swell due to the gas inside expanding.
Troubleshooting Bubbles
Once you know you’re dealing with bubbles, here are the possible causes:
Molding Process
Mold
Machine
Material
High melt temperature
venting
Machine performance
Moisture content
Low back pressure
Hot runner temperatures
Crack in feed throat leaking water
Transparent materials
High decompression
Cracked water line
Screw design
contamination
Venturi effect
unmelts
Table 18.1 Bubbles Troubleshooting Chart, found in Injection Molding Advanced Troubleshooting Guide: The 4M Approach (p. 166)
How to Eliminate Bubbles in Injection Molding
Try running a series of short shots as your first troubleshooting step. Doing so will help you see where the bubble begins to appear, and if it only shows up in specific locations, you can often determine the root cause.
More often than not, the cause of bubbles is excess gas in the part, which can come from high melt temperature, low back pressure or high decompression. Adjusting these settings, again using short shots if you can, could solve the problem.
Otherwise, you’ll need to run through the checklist in the table above and adjust settings as necessary.
As always, using Nanoplas’ innovative line of injection mold coatings such as Heat Cure and Quick Cure, or sprays like Tuff Kote and Dri Kote, will help avoid injection molding problems, particularly when the cause is with the mold, material or machine.
Want to learn more? Check out these other great articles that solve common injection mold issues:
What Causes Plastic Delamination in Injection Molding?
When you’re able to peel the surface of a molded part, layer by layer, you’re dealing with delamination, an injection-molding defect that is sometimes also known as lamination or layering. This is a bad sign—delamination hurts the strength of the part, thus making it unreliable and potentially dangerous, depending on the part’s intended use.
Common Causes of Delamination
Just like most injection-molding defects, delamination can be caused by one or more of several potential issues. The most common: incompatible materials. When two materials can’t bond together, it results in separation that very quickly becomes delamination.
“Incompatible materials” can be a number of things.
Too much moisture on the material, which is usually due to a failure to completely dry the material before using it. During the molding process, moisture becomes steam, which leads to surface delamination.
Delamination can also be caused by high shear stress, too much injection speed, a high melt temperature or material degradation, so you should look at all potential issues while troubleshooting even though you’ll most frequently find your issue with the incompatibility of materials.
How to Eliminate Plastic Delamination
Preventing delamination first requires you to know the cause, but once you do, you should be able to get rid of the problem.
Make sure you’re using plastics that will properly bond with each other. Always take extra care to ensure every part that goes into the mold has been completely dried. When applying mold-release sprays, do so as intended so as not to overspray. If you find that you need more release spray than you know is wise, then your issue could be with the mold itself and you may want to rethink the design to make ejection easier.
If you find the issue to be with the molding process, such as shear stress or melt temperature, adjust those settings as necessary to eliminate delamination.
Nanoplas Mold Release Products
Our Heat Cure™ and Quick Cure coatings are specifically designed to allow non-stick ejection and prevent delamination. They are semi-permanent coatings applied in-house and can last for thousands of shots.
As opposed to other sprays that go on heavy and can cause buildup in the mold, our Tuff Kote and Dri Kote high-performance sprays go on light and are ideal for avoiding delamination.
Remember: with all mold-release products, make sure you’re applying them properly.
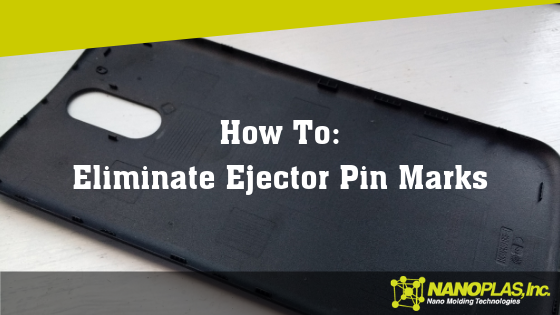
Ejector pin marks, sometimes called pin push, are the glossy or white imprints caused by the ejector pins that show on the class-A surface of the part. These marks can easily crack during the use of the actual products, so you want to prevent ejector pin marks before they happen.
What Causes Ejector Pin Marks?
When the ejector pins try to push the part out of the mold, sometimes the mold sticks, which causes the pin marks to appear on the finished part. However, the issue may not always be with the mold itself, but rather the molding process, machine, or materials.
The most common culprits include:
Over-high injection pressure, over-fast dwell time, overflow mold temperature accompanied by an over-fast or unbalanced cooling speed, which altogether increase the internal stress of products.
Over-small draft, incorrect or insufficient spraying of the mold-release agent or an over-large ejection resistance.
Improper design of the ejector unit and over-fast ejection speeds can result in large ejection stress among the plastic and ejector parts.
Improper design of structure for the products.
How to Eliminate Ejector Pin Marks in Injection Molding
All the above causes create unnecessary internal stress for the molding of products, so we need to reduce the ejection resistance and stress being applied by the ejector pins on the plastic parts.
Avoid excessive injection of melt.
Reduce injection pressure and dwell pressure. Shorten dwell time.
Reduce injection rate, optimize the design of the feed system and realize a sound mold filling.
Properly improve mold temperature, prolong cooling time and reduce cooling speed. Optimize temperature control and product structure to encourage uniform cooling of products in the mold.
Increase draft while ensuring proper retaining mode of plastic parts in the mold.
Analyze the ejection resistance and distribution, then use a suitable ejection mold with properly arranged ejector pins, trying to achieve a balanced ejection. If you see large ejection resistance, increase the number of ejector pins in those areas and expand the section dimensions of the ejector pin. Increase wall thickness where the ejector mark can easily occur in an effort to strengthen the products’ resistance to stress.
Increase smoothness for the cavity surface. Polish along the ejection direction of plastic parts in the final stage of polishing. If you’re polishing a mold that already has ejector pin marks, apply polish corresponding to the ejector mark.
Properly spray the mold-release agent.
Nanoplas Mold Release Products
The best way to solve ejector pin marks is with our Heat Cure™ and Quick Cure coatings. These injection mold coatings are applied either in your tool room or on the press and give exceptional release characteristics to the part in the mold, allowing it to eject without sticking and thereby eliminating any pin push marks.
If the only solution is to use a spray, try our Tuff-Kote and Dri-Kote high-performance mold-release sprays. The sprays go on light and last for many shots, as opposed to other sprays that go on heavier and can cause buildup in the mold, which can lead to later release issues or downtime to clean the molds.
Try our industry leading mold release agents for yourself, request a sample today!