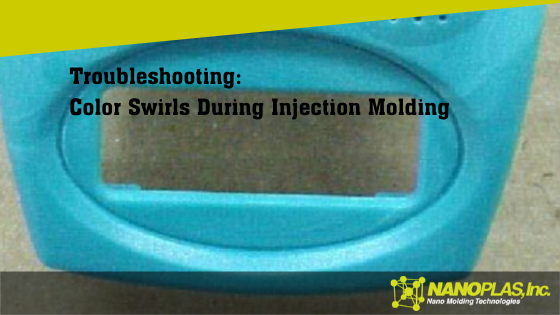
When color isn’t evenly distributed throughout a part, appearing as streaks, swirls or patches of discolored material, you’re probably looking at color swirls. Also known as streaking, color streaks and marbling, color swirls are occasionally misidentified as black and brown streaking, so it’s important to determine which defect you’re dealing with as the first step in your troubleshooting.
If misidentified, many of the solutions to color swirls will actually exacerbate the black and brown streaking, so accurately identifying the problem is a must.
What Causes Color Swirl Problems in Plastic?
When determining the cause—and thus solution—of color swirls, the first thing you need to know is when the problem is occurring. If you’re seeing color swirls after changing from one color to another, the solution won’t be the same as random or always-present swirls.
If the color swirls only appear after changing colors or materials, the culprit probably deals with your purging procedures. Changeovers have to be done correctly or you may be stuck with color swirls for hours.
Color Swirls Troubleshooting Chart
Machine
Material
Molding Process
Screw design
Color concentrate
Low back pressure
Inadequate back pressure
Contamination
Fast screw speed
Hang-up in screw or barrel
Raw component issues
Low melt pressure
Found in Injection Molding Advanced Troubleshooting Guide: The 4M Approach (p. 200).
How to Prevent Color Swirls in Injection Molding
Within the molding process, you need to pay extra attention to back pressure, screw speed and melt temperature. If the back pressure is too low, the material and color concentrate won’t mix properly, leading to color swirls.
Similarly, a fast screw speed can lead to color swirls. The longer the screw rotates, the better the color mix will be, but if screw recovery is too fast, you’ll likely find good results in slowing the speed.
You could be dealing with a melt temperature that’s too low and, since the melt temperature is impacted by so many other factors, it’s important to know exactly what your melt temperature is and that it’s within the recommended range for your material.
If the issue is with the machine, check out the screw design, back pressure and possible hang-up in the screw or barrel, which can prevent it from cleaning out well during color changes. A general-purpose screw design isn’t the best option for color and material mixing, so make sure you’re using a melt-quality screw. If you don’t have enough back pressure, you’ll likely find poor color mixing, which leads to color swirls.
Color swirls emanating from material issues can be due to an incompatible material-to-concentrate relationship, which could be as simple as using a concentrate that’s intended for a different material. You could also be dealing with contamination, which can cause a host of other problems, or a raw component issue.
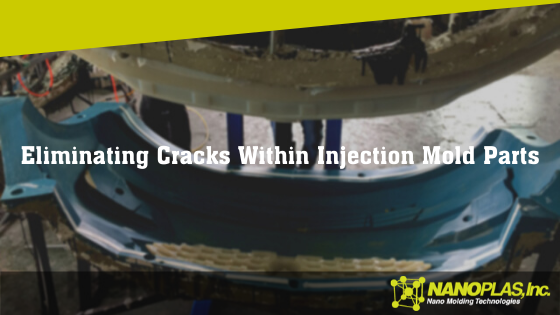
When a part is physically fractured or broken, you’re experiencing cracking. Cracks usually occur due to post-molding conditions, but when troubleshooting cracking, you want to know exactly when the cracking is happening as it will help you efficiently address potential issues and ultimately solve the problem.
Troubleshooting Cracks
In addition to post-molding conditions, cracking can be caused by a number of process settings, including second-stage pressure, melt temperature, residence time in barrel, ejection, part removal, operator error, mold breakaway and gate seal.
Molding Process
Mold
Machine
Material
High second-stage pressure
Undercuts
Overheating
Moisture content
Melt temperature
Sharp corners
Lack of process control
Contamination
Residence time in barrel
Lack of draft
Regrind
Ejection
Lifter or slide corners
Part removal
Operator
Mold breakaway speed
Gate seal
Table 24.1 Cracking Troubleshooting Chart, found in Injection Molding Advanced Troubleshooting Guide: The 4M Approach (p. 224)
How to Eliminate Cracking in Injection Molding
While cracks often occur post-mold, identifying the underlying issue is extremely important in being able to prevent cracking from happening. Check the part design—are there areas with sharp corners that act as stress risers and initiate cracks? If so, adding more radius to those areas can alleviate the stress and thus the cracks.
During the molding process, you could be facing high second-stage pressure, causing the material to stick which can lead to cracks when the mold opens or during ejection. A high melt temperature or improper residence time in the barrel could degrade the part and make it susceptible for cracking during ejection.
Since cracking usually occurs during ejection, it’s important to determine if the ejection itself is causing the issue or if it’s another issue that leaves the part vulnerable to ejection. Stop the mold process prior to ejection and look for cracks. If you see them, you know you have another issue. If there are no cracks, eject the part and check again. If you see cracks this time, you know there’s an ejection issue.
Nanoplas mold-release sprays are invaluable when it comes to ejecting parts and can be a tremendous help if you’re experiencing cracking.
If the part shows no cracks after ejection, it could be a part-removal issue or even an operator error. Something as simple as an operator handling the part could lead to cracking, which generally means there’s a design flaw that needs to be addressed. Simple handling of a part shouldn’t lead to cracking.
Cracking is a troublesome issue, but it can give you a lot of necessary information as to what needs to be improved to eradicate the problem.
Want to learn more? Check out these other great articles that solve common injection mold issues:
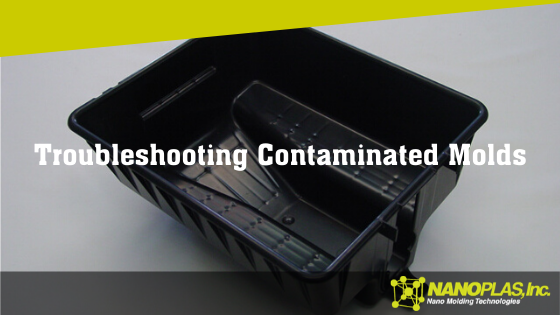
Contamination appears as discoloration, streaks, splay, delamination and other types of defects. Because it’s such a broad area with multiple possible culprits, is best to start with the usual suspect: the material brought to the molding machine.
Troubleshooting Contamination
Starting with the material, then working backward from there if necessary, you’re more likely to catch the root cause of the contamination earlier in the process, saving you time and energy and getting things back up and running as soon as you can.
Molding Process
Mold
Machine
Material
Poor changeover
Hot runner hang-up
Hang-up areas
Improper storage
High melt temperature
High hot runner temperature
Anti-seize
Regrind
Wear Surfaces
Robot contamination
Incoming contamination
Lubricants
Mixed Materials
Cleaning
How to Eliminate Contamination in Injection Molding
Start with material storage. If your material is left in an open container, it’s nearly certain you’ll end up with a contaminant. Every molding shop has dust, dirt, cardboard, wood, metal, grease and other potential contaminants in abundance. If your materials aren’t stored properly, any one of those foreign substances can lead to contamination and a rejected part.
Another potential issue with the material is regrind. Make sure no one is grinding the wrong material with other materials (for example, just because one material is the same color as another doesn’t mean it’s the same material). Improper storage of regrind can be an issue if foreign substances can sully the material. The machine itself, if not properly cleaned, can add contaminants to the regrind.
Avoid mixing materials. Not only can putting the wrong materials together lead to contamination, but some—like PVC and acetal—are dangerous when mixed.
If you confirm everything is being done right with your materials, you can move into the process settings, mold and machine to see if any contaminants are being introduced there.
Want to learn more? Check out these other great articles that solve common injection mold issues:
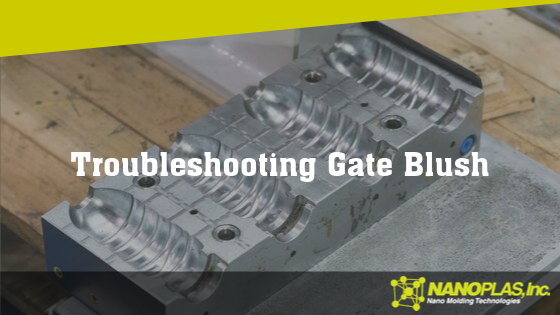
When you see a non-uniform fanning out from the gate, which appears as a different color or gloss level to the surrounding plastic, you may be dealing with gate blush.
What is Gate Blush?
Also known simply as blush, or gate shear or halos, gate blush is a dull or discolored portion usually found just inside the gate location of a part. Occasionally, gate blush will show up in areas where there’s a wall-stock transition.
Blush can be confused with jetting, flow lines and flow marks, so you need to be careful when troubleshooting. Since jetting gives a blush-like appearance, you’ll want to confirm you’re dealing with gate blush before troubleshooting.
Troubleshooting Gate Blush
If you’re experiencing blush, it could be due to the molding process, mold itself or the machine. See below for possible causes.
Molding Process
Mold
Machine
Material
Injection velocity
Gate geometry
Nozzle
Nozzle temperature
Hot runner tip temperature
Machine performance
Mold temperature
Cold slug well
Melt temperature
Gate location
Table 18.1 Gate Blush Troubleshooting Chart, found in Injection Molding Advanced Troubleshooting Guide: The 4M Approach (p. 142)
How to Eliminate Gate Blush in Injection Molding
Most often, the culprit is an injection velocity that’s set too high. However, the solution isn’t as simple as lowering the injection velocity. Not at first, anyway. Before you reduce the fill speed, ensure your gate size and design are adequate. If your blush is caused by something with the tooling design and you try to process around it, you risk other defects, particularly short shots.
Pay attention to all temperatures: nozzle, mold and melt. If the nozzle or mold temperatures are too high, it can impact the first plastic in the mold, resulting in blush. A melt temperature that’s too high can hurt the quality of the initial formation of plastic out of the gate.
As we mentioned, check the size and design of the gate before attempting to process around a potential tooling issue. If the gate isn’t flush to the mold surface, that needs to be adjusted before you change any of the settings with the molding process.
If the problem is with the machine itself, your first place to look should be the nozzle. Its length, style, tip type, tip orifice and heaters all need to match the documented process.
Although less common, there could be issues with the material. PC/ABS blends and TPOs tend to be the most prone to gate blush.
Want to learn more? Check out these other great articles that solve common injection mold issues:
This website uses cookies so that we can provide you with the best user experience possible. Cookie information is stored in your browser and performs functions such as recognising you when you return to our website and helping our team to understand which sections of the website you find most interesting and useful.
Strictly Necessary Cookies
Strictly Necessary Cookie should be enabled at all times so that we can save your preferences for cookie settings.
If you disable this cookie, we will not be able to save your preferences. This means that every time you visit this website you will need to enable or disable cookies again.