There are three types of injection mold release coatings within our Nano Mold Coating family and two ways to apply them, depending on the type of coating you’re using. Our HC and HCF (the food-grade alternative to HC) coatings are applied in the tool room at room temperature and all QC coatings (QC, QCRU and QCSI) are applied in the press in a hot mold.
These coatings have been scientifically formulated with the use of nanotechnology to create a semi-permanent barrier on the surface of molds which facilitates extraordinary plastic or rubber part release. The cured injection mold coating is a non-toxic, and colorless hardened polymer film that is only 100-200 nanometers in thickness so it has no affect on finished part dimensions.
Before we can talk about the actual injection mold coating application, we need to talk about cleaning the substrate, which is the most critical part of the application process. Regardless of what type of coating you’re using, the cleaning process is the same.
First, pre-clean the surfaces with Nanoplas Mold Brite or Power Clean. Remove all debris, oil, lubricants and rust preventatives from the entire mold, including the pores and crevices.
Use the white microfiber cloth included with the kit until you’ve removed all oil and debris. The white cloth makes it easier to see when you’ve gotten everything. Don’t use shop rags as they are often contaminated with lubricants or detergents and we’re trying to get rid of that—not add it.
Next, wet a clean, white cloth with ethanol, alcohol, acetone or MEK solvent to get rid of any remaining degreaser or oils. Before you begin the application process, make sure the surface is completely dry.
Injection Mold Coating Application – HC and HCF
The application method for HC (Heat Cure) and HCF (food-grade Heat Cure) injection mold coatings is the same, done at room temperature in the tool room. You can use a microfiber swab or cloth, depending on the actual mold configuration.
Apply a small amount of coating to the swab or cloth and apply to the surface in one direction. When this is done correctly, the surface should look wet as if you rubbed an alcohol wipe over the surface. If the swab or cloth dries out, reapply coating.
After you apply the coating in one direction, apply a second coating in a perpendicular direction over the same area. The reason for the second coat and change in direction is to make sure the entire surface is coated well, as the coating can be hard to see during application. Make sure there are no streaks or pooling, as that can lead to a sticky residue once cured.
Next, with a standard heat gun, begin the curing process. Set the gun to 550-600 degrees Fahrenheit. With the gun 4-6 inches from the surface, apply heat in a slow, sweeping motion, back and forth, for at least 10 minutes over the entire coated area.
The HC and HCF coatings each have a UV dye that will show up under a black light, allowing you to confirm the entire area has been coated.
You can apply a second coating for a longer coating life if you’d like. One satisfied with your coating, cover the mold with a clean cloth to keep dust from settling into the coating. Let it rest for at least three hours to allow the coating to completely harden.
With any of our Quick Cure family of coatings (Quick Cure, Quick Cure Rubber and Quick Cure Silicone), you’ll apply the coating in the press using the heat control of a thermolator.
After cleaning the mold thoroughly as described above, heat the mold to 120 degrees Fahrenheit. Shake the QC bottle well before using and during any reapplications.
Apply a mist to the surface of the mold or the microfiber cloth included in the kit. Wipe lightly, in one direction, making sure you create a thin, even layer. Remove any excess pooling or streaks immediately. After you’ve covered the entire area, apply the coating again, this time wiping in a perpendicular direction to make sure the area is properly coated.
Once you’ve applied the coating, heat the mold to 240 degrees Fahrenheit and allow it to cure for 15 minutes before production. If your press can’t get to 240 degrees, increase the length of time of the cure proportionally to the reduction in temperature. Once the mold is cured, it’s ready for use.
General Mold Maintenance
When you need to clean your coated molds, we recommend Nano Mold Cleaner, which was designed not to remove the coating. Other injection mold cleaners can gradually remove the coating and reduce mold performance over time.
For a demonstration on how to apply our coatings, watch our video on how to apply injection mold coating.
One of the most important aspects of injection molding, or anything involving machining, is making sure machines are running at peak performance. Any downtime cuts into efficiency and, ultimately, the bottom line. Prolonged downtime can lead to serious problems with customers and nobody wants that.
Injection mold maintenance itself requires machine downtime, but when you plan for it, you’re able to maintain efficiency without the fear of unexpected and potentially disastrous downtime that may arise from failing to maintain your machines.
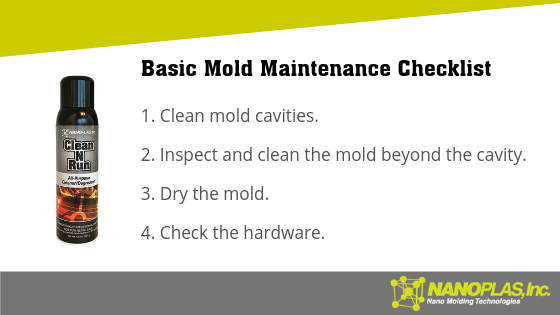
Basic Injection Mold Maintenance Checklist
Before and after every cycle, you should do a basic maintenance check on your mold. This ensures you’re keeping the mold free of potentially harmful debris, which means your parts will come out just as they’re supposed to.
1. Clean Mold Cavities.
First, use a solvent like Nanoplas Clean-N-Run to eliminate any residue that may be left behind in the mold. Spray it on, gently wipe the cavities and dry the mold. Start from the top of the mold and spray in a top to bottom motion as you move down the mold. If the mold needs further cleaning repeat the process or use a cloth to scrub hard to move contaminants. Once done cleaning dry the mold.
Next, hit the molds with compressed air. This helps dry the mold after using Clean-N-Run and also gets deeper into the mold to eradicate any additional debris you couldn’t otherwise reach.
2. Inspect and Clean the Mold Beyond the Cavity.
Debris and water are just as detrimental in the runners and sprues as they are in the cavity and you should never neglect these areas. Use Nanoplas Mold Brite or Clean-N-Run here as well, then follow it up with compressed air. Every part of the mold should be clear of debris before you run another cycle.
3. Dry the Mold.
Part of the compressed-air benefit is aiming toward completely drying the mold, but this is an important point, especially before storing the mold: the mold needs to be completely dry. If any water is left behind in a metal mold, you’re at risk for rust, which can cause a slew of problems. Rusty molds create more rejected pieces and are also prone to failing completely. Prevent these problems before they start by making absolutely sure your molds are dry.
4. Check the Hardware.
Make sure everything is in working order with your bolts, screws, plates and anything else fastening your mold. Nothing should be loose and there should be very little wear on these components.
Advanced Injection Mold Maintenance Checklist
Even with daily or twice daily mold machine maintenance as discussed above, the reality is certain parts will eventually wear out and need to be replaced. In addition to following the basic injection molding maintenance checklist before and after every cycle, you’ll want to do deeper inspections at longer intervals.
You should perform this maintenance at regular intervals determined by what type and how many cycles you’re running.
Check Ejection Components
All ejection components, including ejection pins, should be inspected. If you notice any damage, replace the parts. Also, make sure all the parts are appropriately lubricated. Do this every 10,000 cycles or so.
Additionally, Check All Non-Ejection Components
You don’t need to do this as frequently (maybe every five to 10 times you check the ejection components), but your inspections should never be limited to only ejection components. All parts related to the mold need to be checked for wear, damage and lubrication, including gaskets, valves and springs.
The Value of Preventive Injection Mold Maintenance
As discussed earlier, there is a cost associated with preventive maintenance: downtime of your machines and the manpower to perform the checks. However, this cost is virtually nonexistent when compared to the much higher cost of unexpected and potentially prolonged downtime, rejected parts and other hassles that hinder efficiency.
By getting in the habit of performing regular maintenance checks, you can keep your machines—and your business—running efficiently. Learn more about the different offerings that Nanoplas provides to keep your mold machinery maintained and in good shape here.
Welcome to our Plastic Injection Molding Defects series, where we will explain some common defects seen by injection molders and present ways to fix or prevent them.
What is Buildup?
Sometimes called gas buildup or plate out, buildup in injection molding is easy to see on the cosmetic surfaces of the part, appearing rough. You’ll know buildup when you see it as it’s not confused with any other injection molding defects.
Buildup can cause further problems when it occurs in the mold venting, as it makes it harder for the mold to vent gas out of the cavity, which can lead to issues like splay.
What Causes Buildup?
In most cases, buildup forms when volatiles leave the plastic and collect on the surface of the mold. There are several reasons this could be happening, but most of the time, you’ll be able to solve your buildup problem if you can figure out what’s causing the excess volatiles and whether or not those volatiles can be better vented.
If the melt temperature is too high, excess gas can be generated and degrade the materials. Along these lines, too much shear can lead to too high of a melt temperature, which can lead to the gas buildup.
Most of the time, buildup is caused by poor venting. If the mold isn’t vented well enough, the volatiles from the plastic get trapped, directly leading to buildup problems.
Table 19.1 Buildup Trouble Shooting Chart, found in Injection Molding Advanced Troubleshooting Guide: The 4M Approach (p. 174)
Molding Process
Mold
Machine
Material
high melt temperature
vents
machine performance
regrind
excess shear
moisture content
material type
additives
How to Prevent Plate Out in Injection Molding
If you’ve determined your buildup is caused by a venting issue, make sure all vents are open and are deep enough with a large enough land length.
Nanoplas mold-release sprays, coatings, and cleaners are essential to preventing buildup. Our mold-release sprays and coatings work against buildup the same way they work against pin push: exceptional release characteristics allow the mold to eject without sticking, preventing buildup in the process.
Some competing sprays go on heavy and make it difficult to run the mold effectively, but our sprays and coatings eliminate excess mold release without leaving any residue.
To eliminate buildup, Mold Brite, Power Clean, and Kleen All are excellent choices in mold cleaners. The ultimate cleaner: Zap-Ox, which will clean buildup even when you thought there may not be a solution.
Feel free to contact us if you have questions about our products and how they might solve your injection-molding problems.
Want to learn more? Check out these other great articles that solve common injection mold issues:
Welcome to our Plastic Injection Molding Defects series, where we will explain some common defects seen by injection molders and present ways to fix or prevent them.
What are Burns?
Sometimes known as gas traps or the dieseling effect, burns appear as black or brown deposits, sooty like charcoal, both on the part and the mold surface.
What Causes Burns?
There’s a good reason burns are also called gas traps in injection molding: they’re caused by trapped gases. When gases get trapped during mold filling, high pressures can cause ignition, which leads to the plastic burning. Burns in injection molding are, quite literally, burns.
To determine the cause of your issue, first determine where the gas is coming from, and then ask why isn’t the gas escaping the mold?
You could be looking at fill velocity, melt temperatures, back pressures, or decompression among the molding process. The machine itself could have buildup, damaged parts, or even the wrong screw design. The material may struggle with its moisture content or additives.
The most common culprit deals with mold venting issues. If you determine this is the cause of your problem, do not try to process around a tooling issue. Address all tooling issues before adjusting the process. Many of the other problems are either caused by or made worse by venting. This is the first thing you should check.
Table 20.1 Burns Troubleshooting Chart, found in Injection Molding Advanced Troubleshooting Guide: The 4M Approach (p. 182)
Molding Process
Mold
Machine
Material
too fast fill velocity
venting
buildup on screw, end cap, etc.
moisture content
high melt temperature
grease, oil, or other contamination
screw design
type
high back pressure
barrel heater control problems
additives
decompression
damage to screw, barrel, tip, etc.
How to Prevent and Remove Burn Marks in Injection Molding
It bears repeating: if you have a venting issue, do not process around it. When your mold isn’t venting well enough, it can make any of the other causes of burns worse. When you improve your mold venting, you eliminate most burning issues.
Also, reach for the Cera Lube. Because over-greasing and grease breakdown can cause burning, Nanoplas Cera Lube, which neither breaks down nor bleeds, is the best solution.
Feel free to contact us if you have questions about our products and how they might solve your injection-molding problems.
Stay tuned for future installments of our plastic injection molding defects series.
Welcome to our Plastic Injection Molding Defects series, where we will explain some common defects seen by injection molders and offer ways of fixing or preventing them.
What is Splay?
Splay is a cosmetic defect that occurs in plastic injection molding, when silver or white streaks appear on the surface of the part.
It can be difficult to determine what is truly splay, as its appearance is very similar to other defects. Lookalikes include surface scratches, scuffs, flow lines, delamination from contamination, and flaking (also known as cold slugs).
What Causes Splay?
There are many possible culprits for the appearance of splay. Chapter 42 of Injection Molding Advanced Troubleshooting Guide: The 4M Approach outlines a specific troubleshooting method for determining the source and correcting it. The defect could be due to any number of issues with the molding process, the mold itself, the machine, or the material.
Table 42.1 Splay Troubleshooting Chart, found in Injection Molding Advanced Troubleshooting Guide: The 4M Approach (p. 414)
Molding Process
Mold
Machine
Material
drying
venting
screw design
contamination
high melt temperature
hot runner temperatures
temperature control
excessively wet
decompression
cold slug wells
damaged components
wrong material
back pressure
sprue and nozzle tip orifice
cracked feed throat
blowing agent
screw recovery rate
sharp corners
lack of process control
residence time
gate flaking
screw recovery
lubricants
feed throat temperature
cracked mold
inconsistent material feed
leaking air
Venturi effect
To begin, determine how the defect appears on the parts. If the marks appear consistently in the same location on parts, the problem is likely stemming from the mold itself. If the defect is all over the part and/or appears in random places, that usually means the issue comes from the molding material or process.
We recommend referencing the Troubleshooting Guide to help you fully understand which of the above may be causing the defect and how to best fix it. At Nanoplas, we are particularly familiar with lubricants’ contribution to splay through our discussions with molding professionals over the years, so we’ll explore ways to address this possible culprit in the rest of this post.
Over-Lubricated Molds Can Cause Splay
If the defect appears immediately after the mold has come back from the toolroom, it may be due to too much grease or lubricant being applied to the mold. In this case, grease from the lifters or ejector pins can bleed onto the core surface, get pulled onto the surface, and leave splay marks or streaks.
Similarly, lubricants and metal protectants can become trapped in mold inserts and bleed out, getting pulled onto the mold surface and causing splay.
“Less is more” when it comes to applying mold maintenance products in a way that won’t cause problems. You may need to wipe out the excess lubricant, even disassembling the mold as necessary to get all the excess. For more information related to mold maintenance, read: How to Properly Apply Injection Mold Coating.
If decreasing the amount of grease or lubricant causes wear or other issues, you may want to try higher performing mold maintenance products that can do the job with less volume per application.
How to Fix Splay
Again, be sure to fully troubleshoot each key area of injection molding—the molding process, mold, machine, and material—to find the true source and determine the best course for addressing your unique situation.
If you suspect the mold grease is causing the issue, it may be time to try something new.
Switch Mold Maintenance Products
Nanoplas has several products that can eliminate splay caused by over-lubrication.
Some rust preventatives can use a heavy wax or too much solvent, making it necessary to clean the mold before use to prevent splay caused by the bleeding or breakdown of grease. The Nanoplas family of rust preventatives are truly “dry” and leave a light film that will not bleed or break down grease. On a typical startup, the Nanoplas rust preventatives will be gone in 2-4 shots.
If grease is getting into the molding area, that means it is breaking down from a rust preventative, cleaner, or heat. Nanoplas greases do not break down and will not bleed into the molding area like other greases. This eliminates grease from the splay equation.
Feel free to contact us if you have questions about our products and how they might solve your injection molding problems.
Want to learn more? Check out these other great articles that solve common injection mold issues:
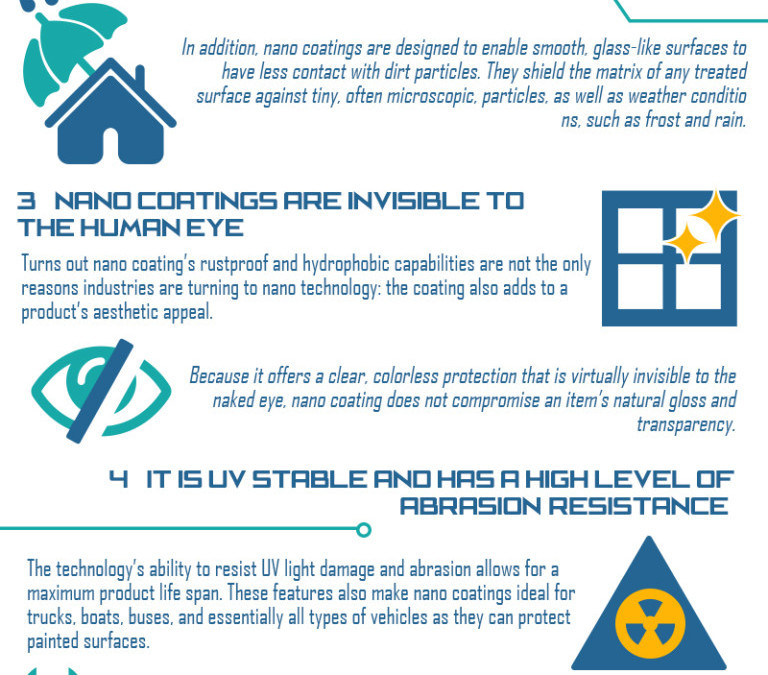
The infographic below is from our friends at Economy Glass in Australia. It does a nice job of explaining nano coatings, and their impact on manufacturing.