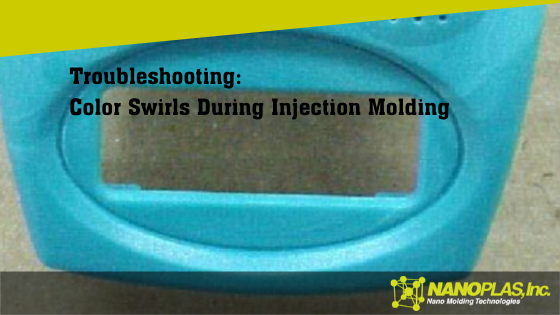
When color isn’t evenly distributed throughout a part, appearing as streaks, swirls or patches of discolored material, you’re probably looking at color swirls. Also known as streaking, color streaks and marbling, color swirls are occasionally misidentified as black and brown streaking, so it’s important to determine which defect you’re dealing with as the first step in your troubleshooting.
If misidentified, many of the solutions to color swirls will actually exacerbate the black and brown streaking, so accurately identifying the problem is a must.
What Causes Color Swirl Problems in Plastic?
When determining the cause—and thus solution—of color swirls, the first thing you need to know is when the problem is occurring. If you’re seeing color swirls after changing from one color to another, the solution won’t be the same as random or always-present swirls.
If the color swirls only appear after changing colors or materials, the culprit probably deals with your purging procedures. Changeovers have to be done correctly or you may be stuck with color swirls for hours.
Color Swirls Troubleshooting Chart
Machine
Material
Molding Process
Screw design
Color concentrate
Low back pressure
Inadequate back pressure
Contamination
Fast screw speed
Hang-up in screw or barrel
Raw component issues
Low melt pressure
Found in Injection Molding Advanced Troubleshooting Guide: The 4M Approach (p. 200).
How to Prevent Color Swirls in Injection Molding
Within the molding process, you need to pay extra attention to back pressure, screw speed and melt temperature. If the back pressure is too low, the material and color concentrate won’t mix properly, leading to color swirls.
Similarly, a fast screw speed can lead to color swirls. The longer the screw rotates, the better the color mix will be, but if screw recovery is too fast, you’ll likely find good results in slowing the speed.
You could be dealing with a melt temperature that’s too low and, since the melt temperature is impacted by so many other factors, it’s important to know exactly what your melt temperature is and that it’s within the recommended range for your material.
If the issue is with the machine, check out the screw design, back pressure and possible hang-up in the screw or barrel, which can prevent it from cleaning out well during color changes. A general-purpose screw design isn’t the best option for color and material mixing, so make sure you’re using a melt-quality screw. If you don’t have enough back pressure, you’ll likely find poor color mixing, which leads to color swirls.
Color swirls emanating from material issues can be due to an incompatible material-to-concentrate relationship, which could be as simple as using a concentrate that’s intended for a different material. You could also be dealing with contamination, which can cause a host of other problems, or a raw component issue.
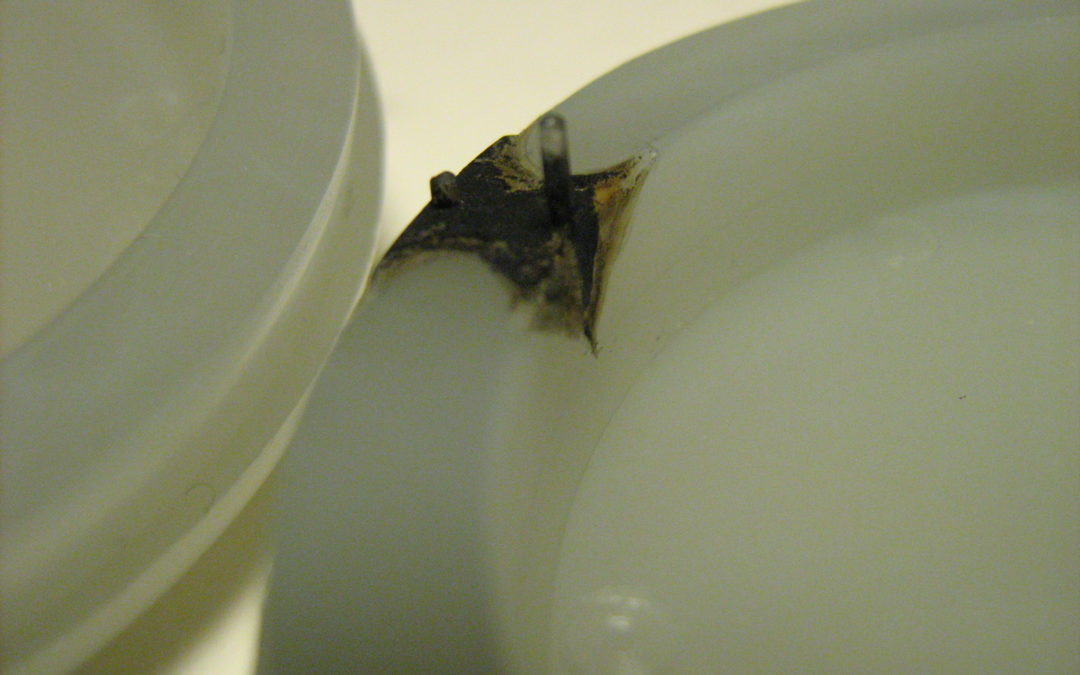
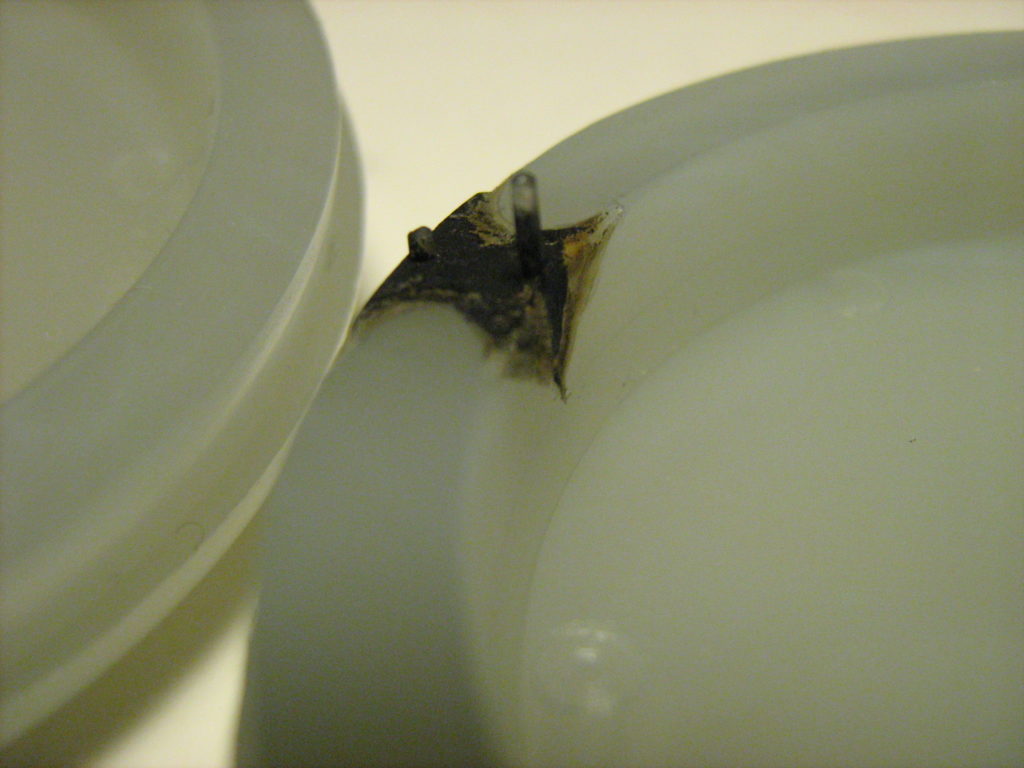
Sometimes known as dieseling or gas traps, burns in injection molding are literally that: burns. Often appearing as black, smutty deposits on the part and mold surface, these are spots at which the plastic has burned.
Not to be confused with color swirl or brown streaking, burns are actual burns to the part and/or mold and need to be treated as such.
What Causes Burns?
Although usually caused by a venting issue, the culprit can come from one of four areas: molding process, the mold itself, the machine or the material.
When gas gets trapped in the mold, high pressures can cause ignition, which leads to the burns. But why are gases getting trapped? This is what we need to diagnose and solve. If you can avoid it, don’t try to process around a burn issue. Look at tooling issues before you start altering the process.
Burns Troubleshooting Chart
Mold
Machine
Materials
Molding Process
Venting
Buildup on screw, endcap, etc.
Moisture content
Too fast fill velocity
Grease, oil, or other contamination
Screw design
Type
High melt temperature
Barrel heater control problems
Additives
High back pressure
Damage to screw, barrel, tip, etc.
Decompression
Found in Injection Molding Advanced Troubleshooting Guide: The 4M Approach (p. 182).
How to Prevent Burns in Molded Plastics
As we said earlier, improper venting is the most frequent cause of burns in injection molding. When troubleshooting the mold—which is where you should start—make sure there’s proper venting. Improving the venting of a mold will often solve the burn problem. Along with that, make sure the mold is clean. Even if the mold has proper venting, contaminants in the mold can hinder the venting from working properly.
The machine could have buildup on the screw, or the screw design itself could be a problem. There could be damage to the screw (or the barrel or tip or other parts) or you may have control problems with the barrel heater. Any of these things can cause dieseling on your parts.
Next, take a look at the materials. Higher moisture content leads to a greater chance of creating gas as the water gets hot and turns into steam. Some materials, like PVC and acetate, simply burn easier than others, so keep that in mind as you process.
After going through all possible tooling issues, you can get into the process. Again, trying to process around a burn issue isn’t ideal—adjusting fill velocity, melt temperature, back pressure and decompression is fine if you’re confident in your machine and materials (particularly the venting), but trying to change the process before checking out tooling issues will only make things less efficient and, probably, more expensive.
As mentioned earlier, contaminants in the mold can hinder venting. To remove contaminants, try the Nanoplas line of cleaners. Formulated with superior cleaning agents, they get grime and dirt out of the pores of the substrate, cleaning down to the virgin metal.
If there is harder to remove residue, like gas stains, you can use Zap-Ox cream cleanser, which eliminates the toughest gas stains without etching the surface. Simply apply Zap-Ox and move it around until all the residue is gone – no scrubbing required.
Mold Making and Injection Molding: Two Separate Worlds
During the first 14 years of my career, when I was building and designing injection molds, gating and runners were not really a focus. In most cases mold making and Injection Molding are two different worlds, so in my case I had no idea what was going on over in the injection molding side. The gates and runners had no impact on my focus, which was to build robust tools. In 2002 when I made the switch from Mold Making to the Injection Molding arena, gating and runners were an area that jumped out at me right away as not really having any type of standard. (more…)
“In today’s world, the green movement is more important than ever. No matter what the industry, it’s a company’s duty to make changes and choices that support the environment.”
Here’s a great article from The Rodon Group about working with injection molders that are environmentally friendly in their practice. The article lists some of the things you should look for in a company including lead manufacturing processes such as waste minimizing technology and landfill-free facilities.
Your mold maintenance strategy should include rust prevention. If you do not use the right methods to prevent your tooling and mold from rust, you may as well put paid to your manufacturing process. Once rust affects your molds and tooling, it will be quite expensive to get rid of. And this is one expense that’s unnecessary if you have the right mold maintenance.
Choosing the Right Anti-Rust Product
It’s important you choose an anti-rust product that is designed for industrial use. The product should be such that it forms a gel-like film in the mold and if it’s scratched or nicked, it should flow back to its original position.
Typically, a good rust preventive does not have wax or any similar ingredient because it can accumulate on the mold surface. If this happens, you would have to spend more time, money and effort cleaning up the surface of the mold. The preventive should have the ability to displace tiny droplets of water that condense on the surface of the mold, so that the water does not come in contact with the mold surface, leading to rust formation.
Rust Preventive Measures
There are several methods and techniques to prevent rust formation during mold maintenance. You can use one or all of these methods for optimal results.
Spraying the Mold: One of the most effective ways to prevent rust in injection molds is by spraying the right anti-rust product into the mold right after the molding process is over. At this point, the mold is warm and the product will adhere to the mold surface until it can be taken to the tool room for thorough cleaning. Once the mold is cleaned, once again the rust preventive can be coated properly on the mold. As a result, your mold gets a dual-layer of protection that will prevent corrosion at all costs.
Protecting the Sprue Bushings: While it is important to protect the interior of the mold from rust, you should never neglect the sprue bushings. If the bushings get corroded, you will find it tough to get a seal using the barrel nozzle. Even the exterior surface of the mold should be coated with anti-rust preventative to ensure optimal protection. This will prevent the bases of the mold from rusting. If the bases corrode just where they fasten onto the plates, it will be difficult to keep the two halves of the mold parallel.
Watch Out for Bleed-Out: Depending on the type of rust preventative you use and the method of application, the preventative can bleed-out solvents, oils, and anti-rust compounds when the mold is used. In such cases, you can use a solvent cleaner to remove the bleed-out.
When it comes to rust preventive, you should have a mold maintenance process that is carried out on a daily basis. The process should involve cleaning the mold at the end of the day with a high quality solvent cleaner followed by a coating of rust preventative.
For more information about rust preventatives and best practices for mold maintenance, please feel welcome to contact us.
This website uses cookies so that we can provide you with the best user experience possible. Cookie information is stored in your browser and performs functions such as recognising you when you return to our website and helping our team to understand which sections of the website you find most interesting and useful.
Strictly Necessary Cookies
Strictly Necessary Cookie should be enabled at all times so that we can save your preferences for cookie settings.
If you disable this cookie, we will not be able to save your preferences. This means that every time you visit this website you will need to enable or disable cookies again.
 Mold Making and Injection Molding: Two Separate Worlds